What is Jenkins?
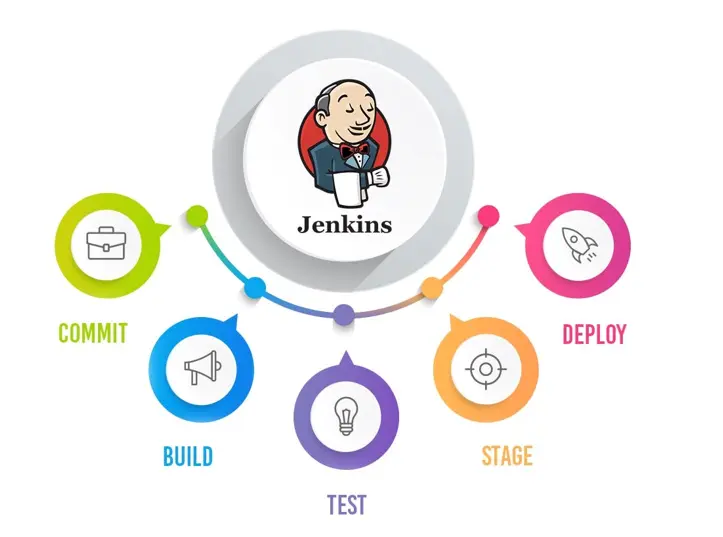
What is Jenkins in software development? Jenkins is a robust CI/CD orchestration tool designed to streamline the build, test, and deployment processes, enabling automating tests efficient flawless software testing. It is a self-contained application containing all the necessary components to automate the entire build lifecycle. You may be wondering, how does Jenkins work for automation testing?

Jenkins can be utilized for:
- Automating application builds
- Running automated tests
- Deploying applications
It offers flexibility in installation:
- Native system packages
- Running in a Docker container
- Operating standalone on any machine with a Java Runtime Environment (JRE) installed
Jenkins acts as the backbone of CI/CD pipelines, ensuring continuous integration and delivery.
Why Use Jenkins for Test Automation?
Jenkins is a popular choice for CI/CD orchestration and offers seamless integration with various test automation tools and frameworks. Automating Selenium test suites with Jenkins, Here’s how Jenkins can enhance test automation:
- Automates Test Suites:
Jenkins integrates with popular test frameworks like Selenium, Cucumber, and Appium. It can run automated test suites for every build within the CI pipeline. - Summarizes Test Results:
Most Jenkins plugins compile test results and present them in HTML reports, ensuring that stakeholders can quickly review outcomes. - Visualizes Test Trends:
Jenkins tracks past test results and displays them as trend graphs, providing insights into the health of the test pipeline over time. - Detailed Failure Logs:
Jenkins logs test failures in a structured manner, making it easy to pinpoint and address issues.
Key Advantages of Jenkins
Jenkins is an open-source CI/CD tool with a rich ecosystem of plugins. Here are some of its core benefits:
- Pipeline Creation: Jenkins can efficiently build pipelines and workflows for CI/CD.
- Source Control Integration: It integrates with source control tools like Git, Bitbucket, and others.
- Chat Notifications: Jenkins supports integration with communication tools such as Slack and Microsoft Teams to notify about build status updates.
- Flexible Build Scheduling: Jenkins allows you to schedule builds periodically or trigger them based on code changes.
- HTML Test Reporting: It generates HTML reports for automated test executions.
- Email Notifications: Jenkins can send automated email reports about test execution status.
Challenges of Using Jenkins
While Jenkins is a powerful automation tool, it does come with some limitations:
- Plugin Complexity:
The open-source community has created a vast number of Jenkins plugins. This can make it difficult for users to choose the correct plugins, as multiple plugins may offer the same functionality.Common issues with Jenkins plugins and fixes - Docker Integration Limitations:
Jenkins’ integration with Docker is still improving and can be somewhat cumbersome compared to other CI/CD tools. - No Native Cloud Hosting:
Jenkins does not provide its own cloud service. Instead, users must rely on cloud hosting options for Jenkins pipelines like AWS, GCP, Azure, and Cloudbees for hosting. - Steep Learning Curve:
The Jenkins setup and configuration process can be complex due to its extensive options and numerous settings. - Plugin Customization Constraints:
Jenkins plugins are often not customizable, which limits flexibility. - Documentation Gaps:
Community-driven plugins frequently lack comprehensive documentation, making it harder to configure and troubleshoot.
When Should You Use Jenkins for Test Automation?
Jenkins is a reliable choice for most test automation needs, thanks to its extensive plugin support and flexibility. Here are some scenarios where Jenkins excels:
- Simple CI/CD Workflows:
For streamlined and straightforward CI processes, Jenkins offers an ideal fit. Test scripts can be executed, and automated test reports are generated efficiently. - Trusted Plugin Integrations:
It’s best to use Jenkins plugins that come from reputable sources, preferably provided by the developers of the test tools themselves. This ensures smooth integration and minimizes unexpected issues.
Step 1: Prerequisites
Before starting the Jenkins installation, ensure you have the following prerequisites:
- A system running Linux, Windows, or macOS.
- A working Java installation (Jenkins requires Java 8 or later).
- Sufficient system resources (at least 2 GB RAM recommended).
Step 2: Installing Jenkins
Option A: Installing Jenkins on Ubuntu (Linux)
- Update System Packages Open your terminal and run:
sudo apt update
sudo apt upgrade -y
- Install Java Jenkins requires Java 8 or higher. Install OpenJDK:
sudo apt install openjdk-11-jdk -y
- Verify Java Installation
java -version
- Add Jenkins Repository and Import Key
curl -fsSL https://pkg.jenkins.io/debian/jenkins.io.key | sudo tee \
/usr/share/keyrings/jenkins-keyring.asc > /dev/null
echo deb [signed-by=/usr/share/keyrings/jenkins-keyring.asc] \
https://pkg.jenkins.io/debian-stable binary/ | sudo tee \
/etc/apt/sources.list.d/jenkins.list > /dev/null
- Install Jenkins
sudo apt update
sudo apt install jenkins -y
- Start Jenkins Service
sudo systemctl start jenkins
sudo systemctl enable jenkins
- Check Jenkins Status
sudo systemctl status jenkins
Option B: Installing Jenkins on Windows
- Download Jenkins Installer Go to the official Jenkins website: https://www.jenkins.io/download/
Download the Windows installer (MSI).
- Run the Installer
- Open the downloaded MSI installer.
- Follow the installation wizard, select the installation directory, and proceed with the default settings.
- Install Java
- Jenkins for Windows comes with a prompt to install Java if it’s not already installed.
- If not installed, follow the instructions to install Java 8 or higher.
Step 3: Access Jenkins Dashboard
For Linux
- Open your web browser and navigate to:
http://localhost:8080
If Jenkins is running on a remote server, replace localhost with the server’s IP address.
For Windows
- Open your web browser and go to:
http://localhost:8080
You’ll see the Unlock Jenkins page.
Step 4: Unlock Jenkins
Jenkins requires you to unlock it during the initial setup.
- Find the Initial Admin Password
- For Linux, run the following command:
sudo cat /var/lib/jenkins/secrets/initialAdminPassword
- For Windows, the password is located in:
C:\Program Files (x86)\Jenkins\secrets\initialAdminPassword
- Enter the Password
- Paste the password in the Unlock Jenkins page.
Step 5: Install Suggested Plugins
- After unlocking Jenkins, you’ll see a screen to install plugins.
- Select “Install Suggested Plugins”. Jenkins will automatically install the most commonly used plugins.
- This process might take a few minutes.
Step 6: Create First Admin User
- After installing plugins, Jenkins will prompt you to create your first admin user.
- Enter the following details:
- Username
- Password
- Full Name
- Email Address
Click Save and Continue.
Step 7: Run Jenkins Using the WAR File
To start Jenkins manually on Windows using the .war file:
- Open Windows Command Prompt.
- Navigate to the directory where the Jenkins.war file is located.
- Run the following command:
java -jar Jenkins.war
- Keep the Command Prompt open. This process will run Jenkins until you close the terminal window.
- Once Jenkins starts, you’ll see output indicating that the server is running on:
- Copy the Initial Admin Password
Open a new Command Prompt window and run:
bash
Copy code
type C:\Program Files (x86)\Jenkins\secrets\initialAdminPassword
OR:
bash
Copy code
cat <path_to_jenkins>\secrets\initialAdminPassword
Save this password in a Notepad file, as you will need it later.
Step 3: Access the Jenkins Dashboard
- Open your web browser and go to: http://localhost:8080.
- Enter the Admin Password copied earlier.
- You’ll be directed to the Jenkins Unlock Dashboard.
Step 4: Install Maven Plugin
Installing Maven in Jenkins helps automate your Java project builds and dependency management.
- In the Jenkins Dashboard, go to:
Manage Jenkins → Plugins (under System Configuration)
- Click on the “Available” tab.
- Search for “Maven Integration”.
- Select the plugin and click Install.
- Wait for the installation to complete and restart Jenkins if required.
Step 5: Configure JDK, Maven, and Git Paths in Jenkins
Setting up JDK, Maven, and Git paths is essential to run Java automation projects.
- Go to the Dashboard and navigate to:
Manage Jenkins → Tools Configuration
- Add JDK Path
- Click “Add JDK”.
- Provide the JDK installation directory path and name.
- Add Maven Path
- Click “Add Maven”.
- Provide the Maven installation location and specify its name.
- Add Git Path
- Click “Add Git”.
- Provide the path to your Git executable.
Save the configurations once everything is set up.
Step 6: Run a Maven Project from GitHub in Jenkins
Let’s create and automate by running Maven projects from GitHub using Jenkins.
Step 1: Create a New Jenkins Job
- On your Jenkins Dashboard, select:
New Item.
- Provide the Project Name and select:
- Choose “Maven Project”
- Click “OK”.
Step 2: Configure Your Project
- In the Job Configuration Page:
- Under Source Code Management, select Git.
- Enter the GitHub repository URL (e.g., https://github.com/yourusername/your-java-project.git).
- In Build Triggers, select your desired method (automatic or manual).
Step 3: Configure Build Steps
- In the Build section, add:
Goals and Options
bash
Copy code
clean install
This command tells Maven to:
- Clean the project directory
- Compile code and run tests.
Step 4: Run the Build
- Return to your Jenkins Dashboard.
- Click “Build Now”.
Step 5: View Execution Logs
- You’ll be redirected to the Build History section.
- Click on the build number to access console logs for real-time execution output and debugging.
FAQ
What is Jenkins in software development?
Jenkins is a robust Continuous Integration/Continuous Delivery (CI/CD) tool that automates the entire software build, test, and deployment process. It streamlines workflows by integrating with various tools and frameworks, ensuring faster and more reliable software delivery.
Why is Jenkins used for test automation?
Jenkins is widely used in test automation due to its seamless integration with popular tools like Selenium, Cucumber, and Appium. It automates test suites, summarizes results in reports, visualizes test trends, and provides detailed logs to help identify and fix issues efficiently.
What are the key advantages of using Jenkins?
Jenkins offers several advantages, including:
- Efficient pipeline creation for CI/CD workflows
- Integration with source control tools like Git and Bitbucket
- Flexible build scheduling
- HTML test reporting
- Automated notifications via email or chat tools like Slack
What challenges can users face when using Jenkins?
Some challenges with Jenkins include:
- Complexity in choosing the right plugins due to the vast plugin ecosystem
- Limited native cloud hosting options
- The steep learning curve for beginners
- Gaps in plugin documentation
- Plugin customization constraints


